Introduction
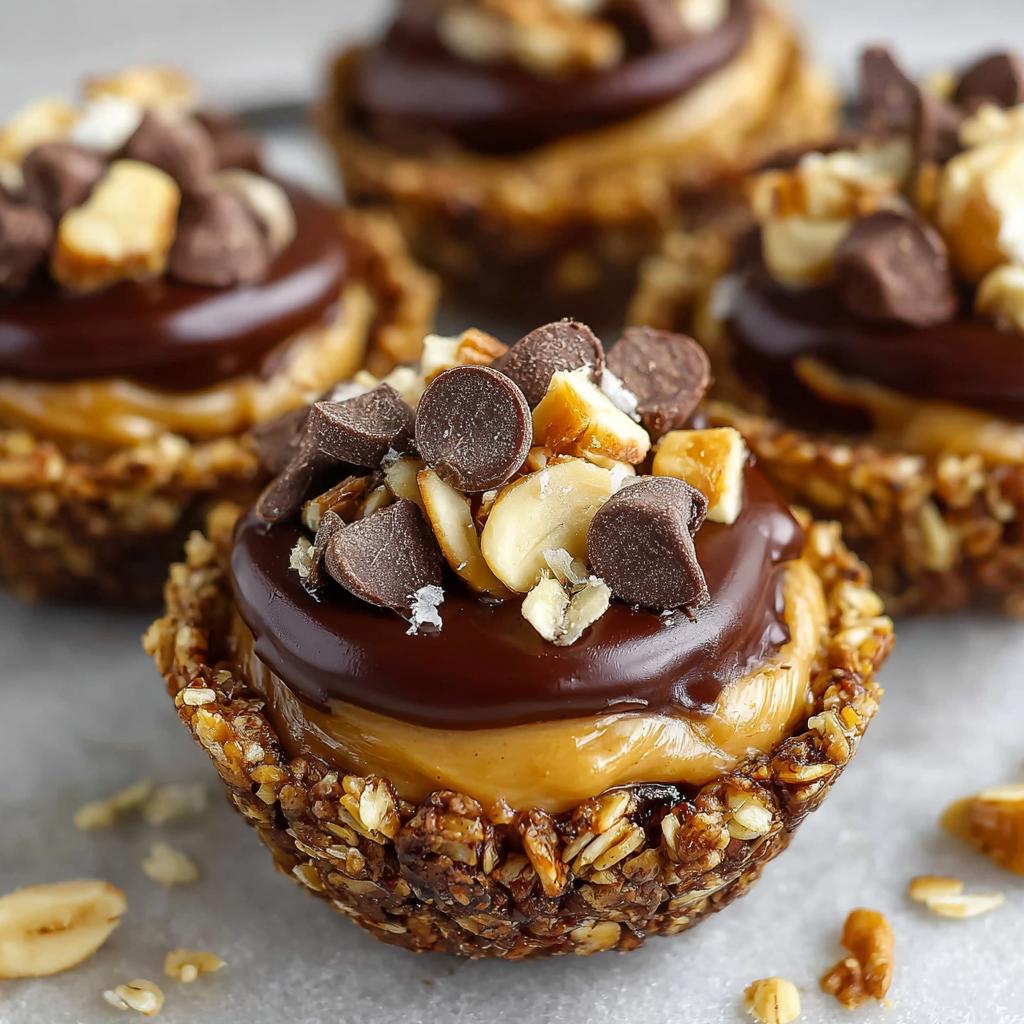
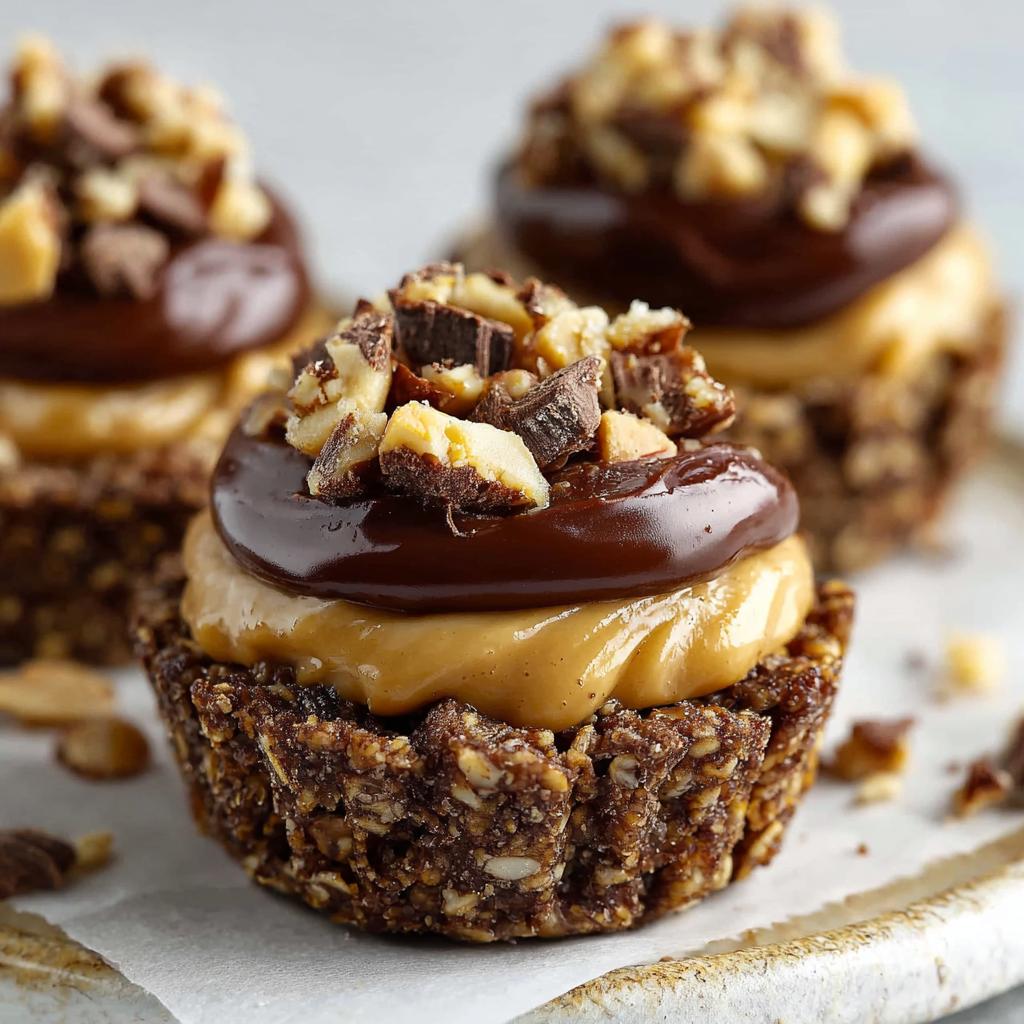
There's something irresistibly charming about desserts that combine crunch with creaminess, and these chocolate granola cups with peanut butter filling do just that. Perfect for those who crave a sweet snack that also feels wholesome, these cups offer the best of both worlds.
Made with simple ingredients, they are easy to whip up, making them ideal for busy afternoons or unexpected guests. Whether enjoyed as a breakfast treat or a satisfying dessert, they deliver a delicious dose of energy and joy.
Ingredients
- 2 cups rolled oats
The base of your granola cups, rolled oats provide fiber and complex carbohydrates for sustained energy. Their chewy texture holds the cup together while giving it a wholesome character. - 1/2 cup almond flour
This ingredient adds protein and healthy fats, contributing to the overall texture. Almond flour also gives a slightly nutty flavor, enhancing the overall taste of the granola cup. - 1/4 cup cocoa powder
Cocoa powder infuses your cups with rich chocolate flavor without adding too much sweetness. It also provides antioxidants, making these treats a tad healthier. - 1/3 cup honey or maple syrup
As a natural sweetener, honey or maple syrup binds the dry ingredients while adding sweetness. They bring a hint of their unique flavors, making the cups more complex. - 1/4 cup coconut oil, melted
Coconut oil acts as a binder and contributes to the richness of the granola cups. Its subtle coconut flavor can complement the chocolate nicely while making them a bit indulgent. - 1/2 teaspoon vanilla extract
Vanilla extract enhances the overall flavor profile, lending a warm aroma and depth to the dessert. It balances the sweetness and amplifies the taste of the cocoa. - 1/4 teaspoon salt
A pinch of salt elevates the flavors of the other ingredients, making the chocolate more pronounced and the overall taste more rounded. - 1 cup natural peanut butter
This serves as the luscious filling in your granola cups, providing creaminess and protein. The natural sweetness of peanut butter beautifully contrasts with the rich chocolate base. - 2 tablespoons chocolate chips (optional)
For even more chocolatey goodness, chocolate chips can be added to the filling or sprinkled on top. They melt slightly, creating a delightful gooeyness that pairs wonderfully with the peanut butter.
Directions & Preparation
Step 1: Preheat the oven to 350°F (175°C).
Preheating the oven ensures that your granola cups bake evenly from the moment they go in. A consistent temperature helps in achieving the right texture and prevents any sogginess in the base.
Step 2: In a large mixing bowl, combine rolled oats, almond flour, cocoa powder, and salt.
Blending these dry ingredients first allows the cocoa and salt to distribute evenly throughout your mixture. This step is crucial as it ensures every bite is flavorful and contains the desired texture.
Step 3: In a separate bowl, mix melted coconut oil, honey/maple syrup, and vanilla extract.
Combining these wet ingredients separately helps dissolve the honey or syrup into the oil, creating a smooth mixture that will effectively bind the dry ingredients later on.
Step 4: Pour the wet mixture into the dry ingredients and mix until well incorporated.
This step is key to achieving a uniform dough-like texture. Ensure no dry patches remain, as this will affect the consistency and baking of your granola cups.
Step 5: Grease a muffin tin and press the mixture into the bottom and up the sides to form cups.
Greasing the muffin tin prevents the granola cups from sticking, allowing them to release easily once baked. Pressing the mixture firmly helps create a sturdy base that holds its shape.
Step 6: Bake for 15-20 minutes or until set and slightly crispy.
Baking time is crucial here; underbaking may lead to cups that collapse, while overbaking can make them too hard. Look for a firm texture and slight browning around the edges.
Step 7: Remove from the oven and allow to cool for 5-10 minutes before removing from the tin.
Letting them cool slightly helps them set further. If they are too hot, the cups might fall apart when trying to remove them. Gentle twisting and a little patience can help save your cups.
Step 8: While cooling, mix the peanut butter filling ingredients until smooth.
Smooth and creamy filling is essential for a delightful bite. Ensure that the peanut butter is natural and free from added sugars to maintain a balance with the sweetness of the granola cups.
Step 9: Fill each granola cup with the peanut butter mixture and top with chocolate chips if desired.
Filling the cups to the brim ensures that every bite is packed with deliciousness. If adding chocolate chips, do it while the filling is still warm so they can melt slightly and meld with the peanut butter.
Step 10: Refrigerate for at least 30 minutes to set.
Chilling the cups allows them to firm up and makes it easier to cut or bite into them. This step also helps the flavors meld together, enhancing the overall taste.
Customizing Your Granola Cups
One of the delightful aspects of chocolate granola cups is their versatility. You can easily customize the filling with add-ins like crushed nuts, chocolate chunks, or even a sprinkle of sea salt for an elevated flavor profile. Additionally, adjusting the sweetness according to your preference allows you to make these cups truly your own!
Pairing Suggestions for Every Occasion
These chocolate granola cups work wonderfully as snacks or dessert. Pair them with a dollop of Greek yogurt for breakfast or serve them alongside fresh fruit for a casual gathering. Their portability also makes them great for picnics or packed lunches, ensuring you always have a satisfying treat on hand.
Nutritional Benefits of Your Cups
This recipe is not only delicious but also packed with nutrients. The oats provide fiber that aids in digestion, while peanut butter adds protein and healthy fats. Together, these ingredients create a balanced treat that keeps you full and satisfied, without compromising on flavor.
FAQs
Can I use different nut butters for the filling?
Absolutely! Almond butter or cashew butter would also work beautifully in this recipe, each lending its unique flavor while maintaining a creamy texture.
What can I do if the granola cups are too crumbly?
If your cups are crumbly, consider increasing the amount of honey or coconut oil slightly. This will add more moisture and help bind the ingredients together.
Can I add extra ingredients like seeds or dried fruits?
Yes! Incorporate seeds like chia or flax, or add dried fruits like cranberries. Adjust the dry ingredients accordingly to maintain the right consistency.
What if my peanut butter filling is too thick?
If your filling is too thick, try adding a small amount of coconut oil or a splash of milk to loosen it up. This will create a smoother, easier-to-spread consistency.
What if I want to make a smaller batch?
You can easily halve the ingredients to make a smaller batch. Just keep an eye on the baking time as smaller cups may cook faster.
Can I use coconut flour instead of almond flour?
Coconut flour can be used, but you'll need to adjust the liquid content as it absorbs more moisture than almond flour. Start with less and adjust as needed.
Conclusion
Making chocolate granola cups with peanut butter filling is not just an enjoyable culinary project; it's also an invitation to experiment. The flexibility of the recipe allows you to tailor the flavors and ingredients to your liking, ensuring you'll never tire of them.
Serve these delightful treats at your next gathering, as part of a breakfast spread, or simply as a sweet energy boost during the day. No matter the occasion, they are sure to impress and satisfy.
Recipe Card

Chocolate Granola Cups with Peanut Butter Filling
Ingredients
Method
- Preheat the oven to 350°F (175°C).
- In a large mixing bowl, combine rolled oats, almond flour, cocoa powder, and salt.
- In a separate bowl, mix melted coconut oil, honey/maple syrup, and vanilla extract.
- Pour the wet mixture into the dry ingredients and mix until well incorporated.
- Grease a muffin tin and press the mixture into the bottom and up the sides to form cups.
- Bake for 15-20 minutes or until set and slightly crispy.
- Remove from the oven and allow to cool for 5-10 minutes before removing from the tin.
- While cooling, mix the peanut butter filling ingredients until smooth.
- Fill each granola cup with the peanut butter mixture and top with chocolate chips if desired.
- Refrigerate for at least 30 minutes to set.
Tried this recipe?
Let us know how it was!Notes
Additional serving suggestions: pair with a crisp salad, garlic bread, or roasted seasonal vegetables for balance.
For make-ahead, prep components separately and assemble just before heating to preserve texture.
Taste and adjust with acid (lemon/vinegar) and salt right at the end to wake up flavors.