Introduction
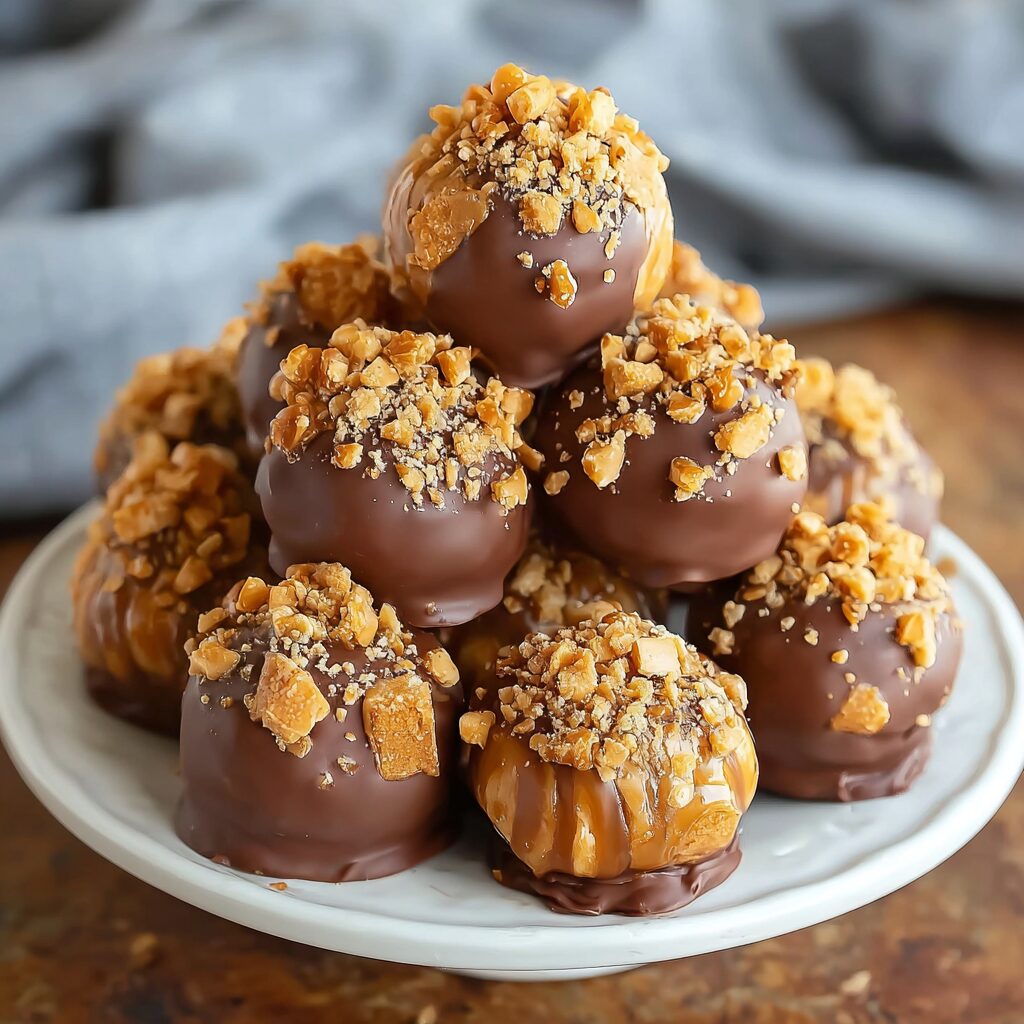
Butterfinger Balls are a perfect treat for anyone looking to indulge in a sweet, crunchy snack that combines creamy peanut butter with the irresistible flavor of Butterfinger candy bars. These delightful bites of goodness are easy to make and are sure to impress friends and family alike.
The beauty of Butterfinger Balls lies in their simplicity. You don’t need advanced cooking skills to whip these up, making them ideal for home cooks at any level. They’re great for parties, holidays, or just a sweet craving that hits at any time.
With just a few ingredients, these treats come together quickly, providing a satisfying combination of textures and flavors that will leave you wanting more.
Ingredients
- 1 cup creamy peanut butter
Creamy peanut butter is the base of the recipe, providing both flavor and a smooth texture that holds the mixture together. It adds richness and natural sweetness that complements the other ingredients. - 1/4 cup unsalted butter, softened
Unsalted butter enhances the creamy texture of the peanut butter mixture and contributes to the overall richness of the Butterfinger Balls. Using unsalted butter allows you to control the saltiness. - 2 cups powdered sugar
Powdered sugar acts as the main sweetener, providing a smooth, melt-in-your-mouth quality to the balls. This sugar dissolves easily, ensuring a well-blended mixture. - 1 teaspoon vanilla extract
Vanilla extract adds a warm, inviting flavor that enhances the overall taste of the Butterfinger Balls. It's a small addition that makes a significant impact on the sweetness profile. - 12 ounces semisweet or milk chocolate, chopped (for dipping, optional)
Melting chocolate for dipping adds a delicious outer layer to the balls, creating a crunchy chocolate coating that contrasts beautifully with the creamy inside. Depending on your preference, you can choose semisweet or milk chocolate.
Directions & Preparation
Step 1: In a mixing bowl, combine the creamy peanut butter, softened unsalted butter, powdered sugar, vanilla extract, and a pinch of salt. Mix until well combined and smooth.
This first step is crucial to ensure all ingredients are evenly incorporated. Using an electric mixer or a sturdy spatula will help achieve a creamy, lump-free mixture which is essential for easy rolling into balls later.
Step 2: Fold in the finely crushed Butterfinger candy bars until evenly distributed throughout the peanut butter mixture.
Adding crushed Butterfinger to the mixture introduces delightful chunks and crunchy bits that make the treats truly special. Folding them in gently ensures that they remain intact, adding texture without turning the mixture mushy.
Step 3: Line a baking sheet with parchment paper or wax paper.
This step prepares the surface where you'll place the rolled balls, preventing them from sticking and making cleanup a breeze. Using parchment paper is highly recommended for easy handling.
Step 4: Scoop tablespoon-sized portions of the peanut butter mixture and roll them into balls using your hands. Place the balls on the prepared baking sheet.
Forming the balls gives the treats their signature shape and allows you to control the size. Make sure to keep your hands slightly wet to prevent sticking, leading to a smooth finish.
Step 5: If desired, melt the semisweet or milk chocolate in a small saucepan over low heat, stirring constantly until smooth. Alternatively, you can melt the chocolate in the microwave in short intervals, stirring between each interval.
Melting the chocolate carefully avoids burning, which can ruin its texture. Stirring ensures even melting so that the chocolate remains glossy and perfect for dipping.
Step 6: Dip each peanut butter ball into the melted chocolate, using a fork or dipping tools to coat evenly. Tap off any excess chocolate and return the coated balls to the baking sheet.
Coating the balls in chocolate creates a fragile yet flavorful shell. The tapping off of excess chocolate prevents pooling and maintains a neat appearance, resulting in a more professional-looking treat.
Step 7: Place the baking sheet in the refrigerator for about 30 minutes, or until the chocolate is set.
Chilling allows the chocolate to harden effectively, providing a satisfying crunch when you bite into the Butterfinger Balls. Proper setting time is key to achieving the desired texture.
Step 8: Once set, remove the Butterfinger Balls from the refrigerator and transfer them to an airtight container for storage.
Proper storage is important to maintain freshness and flavor. An airtight container will keep your treats from drying out, ensuring they remain delicious even after a few days.
Step 9: Serve the Butterfinger Balls chilled or at room temperature, and enjoy the crunchy, creamy goodness with every bite!
Serving these treats chilled enhances their flavor and makes them exceptionally refreshing. Prepare to enjoy the delightful contrast in texture – creamy inside and crunchy outside.

Crunchy vs. Smooth: Choosing Your Chocolate
Selecting the right chocolate is pivotal in creating the perfect Butterfinger Balls. Whether you opt for semisweet chocolate or milk chocolate, the choice will influence the flavor profile. Semisweet chocolate offers a deeper taste, while milk chocolate provides a sweeter, creamier experience. Both types will melt beautifully, so it ultimately comes down to personal preference and the balance of sweetness you desire.
Enhancing Flavor with a Pinch of Salt
Though it may seem counterintuitive, incorporating a pinch of salt into your mixture enhances the overall flavor of these treats. Salt works to counterbalance sweetness, allowing the rich notes of peanut butter and chocolate to shine through. This subtle addition can elevate your Butterfinger Balls from simply good to utterly delightful, so don’t skip this small but significant step.
Creative Additions for a Personal Touch
One of the joys of making Butterfinger Balls is the opportunity for creativity. Adding simple ingredients such as chopped nuts, a dash of cinnamon, or even a splash of espresso powder can introduce exciting flavor variations. Consider experimenting with different textures, like sprinkles or coconut flakes, during the coating process to make your treats truly unique, ensuring they stand out on any dessert table.
FAQs
What should I do if my mixture is too thick?
If the mixture feels too thick to manage, you can improve its consistency by adding a small amount of softened butter or peanut butter and re-mixing. This adjustment will help in achieving a smoother, more workable dough.
Can I use a different type of nut butter?
Yes, feel free to substitute creamy peanut butter with alternatives like almond or cashew butter. Just keep in mind that the flavor profile will change slightly based on the nut butter you choose.
What if the chocolate doesn't coat evenly?
If the chocolate is not coating evenly, ensure it's melted to the right consistency without being too thick. Try dipping the balls again, or use a thinner chocolate by adding a bit of coconut oil to help thin it out.
Can I skip the chocolate coating?
Absolutely! If you prefer a less sweet treat, you can leave the Butterfinger Balls uncoated. They’ll still be deliciously creamy and crunchy without the chocolate.
Are there any ways to customize the sweetness?
You can adjust the sweetness by reducing the amount of powdered sugar or using sugar substitutes like erythritol or stevia. Remember to test the mixture before finalizing the balls to ensure it's to your liking.
How do I make these gluten-free?
To keep the recipe gluten-free, ensure that the Butterfinger candy bars you use are gluten-free, and all other ingredients meet gluten-free standards. Most simple ingredients like nut butter and sugar are naturally gluten-free.
Conclusion
Making Butterfinger Balls is a delightful way to bring a bit of sweetness into your day, whether you're enjoying them at home or sharing with friends. Their irresistible combination of flavors and textures creates an impressive treat that requires minimal effort.
These simple yet delicious bites can be easily adapted to suit your tastes and preferences, encouraging creativity in the kitchen. From experimenting with different chocolate types to adding new ingredients, the possibilities are endless.
Recipe Card

Simple Butterfinger Balls for Delightful Treats
Ingredients
Method
- In a mixing bowl, combine the creamy peanut butter, softened unsalted butter, powdered sugar, vanilla extract, and a pinch of salt. Mix until well combined and smooth.
- Fold in the finely crushed Butterfinger candy bars until evenly distributed throughout the peanut butter mixture.
- Line a baking sheet with parchment paper or wax paper.
- Scoop tablespoon-sized portions of the peanut butter mixture and roll them into balls using your hands. Place the balls on the prepared baking sheet.
- If desired, melt the semisweet or milk chocolate in a small saucepan over low heat, stirring constantly until smooth. Alternatively, you can melt the chocolate in the microwave in short intervals, stirring between each interval.
- Dip each peanut butter ball into the melted chocolate, using a fork or dipping tools to coat evenly. Tap off any excess chocolate and return the coated balls to the baking sheet.
- Place the baking sheet in the refrigerator for about 30 minutes, or until the chocolate is set.
- Once set, remove the Butterfinger Balls from the refrigerator and transfer them to an airtight container for storage.
- Serve the Butterfinger Balls chilled or at room temperature, and enjoy the crunchy, creamy goodness with every bite!
Tried this recipe?
Let us know how it was!Notes
Additional serving suggestions: pair with a crisp salad, garlic bread, or roasted seasonal vegetables for balance.
For make-ahead, prep components separately and assemble just before heating to preserve texture.
Taste and adjust with acid (lemon/vinegar) and salt right at the end to wake up flavors.