Introduction
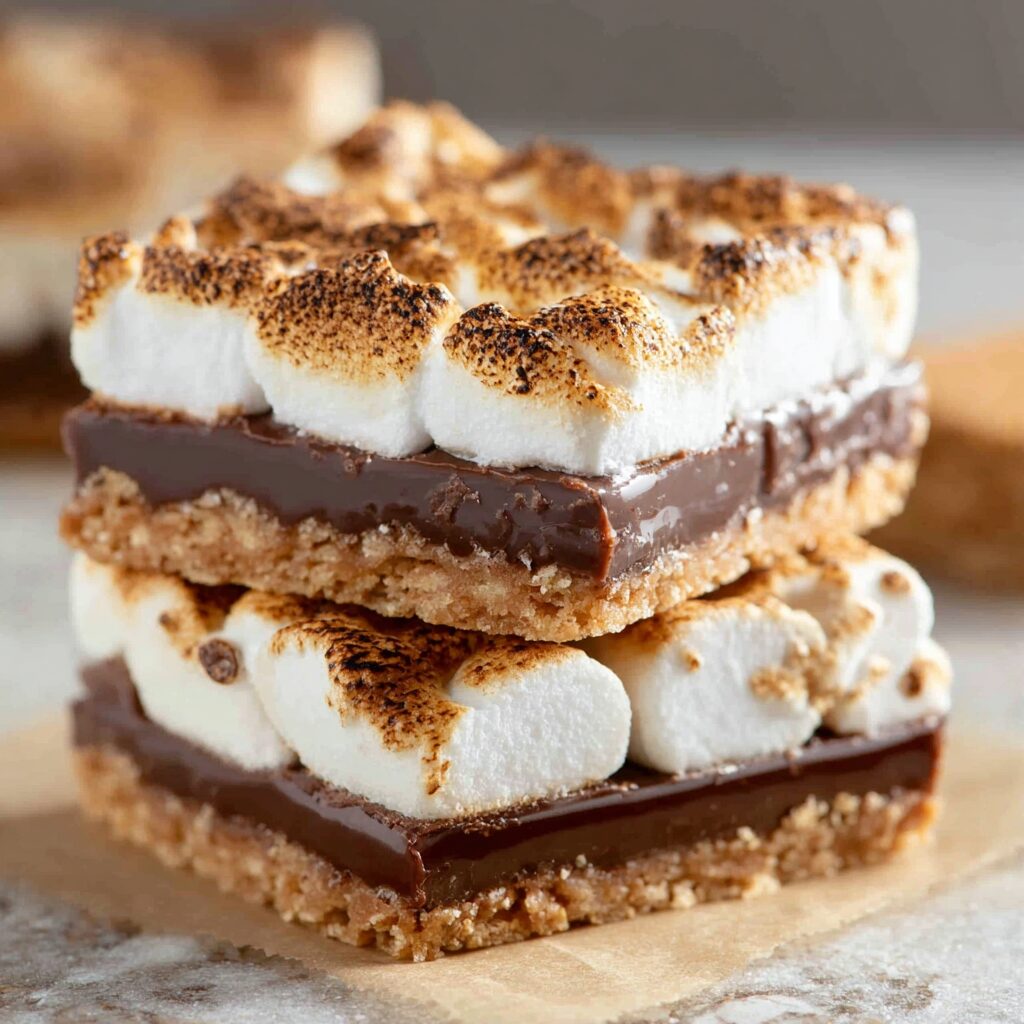
S'mores bars bring the delightful taste of campfire treats right into your kitchen. With layers of graham cracker, rich chocolate, and gooey marshmallows, they offer a nostalgic treat that’s perfect for any occasion.
Unlike traditional s'mores which require a campfire, these bars simplify the experience into a delightful, sliceable dessert. Whether you're hosting a gathering or simply looking for a sweet snack, these bars are sure to impress.
Ingredients
- 1 ½ cups graham cracker crumbs
The graham cracker crumbs form the base of the bars, providing a sweet and slightly crunchy texture. They are essential for mimicking the crust of traditional s'mores. - ½ cup powdered sugar
Powdered sugar helps to bind the crumbs together while adding sweetness without creating a grainy texture. It makes the crust soft yet firm enough to hold the filling. - ½ cup unsalted butter, melted
Butter adds moisture and richness to the crust, enhancing its flavor and ensuring the crumbs stick together. It also helps in browning the crust slightly during baking. - 2 cups milk chocolate bars, broken into pieces
Milk chocolate provides a creamy flavor that melts beautifully, serving as the key chocolate layer in the bars. Its smooth texture balances the crunchiness of the crust. - 3 cups mini marshmallows
Mini marshmallows add that quintessential s'mores element, bringing both sweetness and a soft, gooey consistency. They create an inviting top layer that's perfect for toasting. - ¼ cup chocolate chips (optional)
Chocolate chips enhance the chocolate flavor and provide a melty texture on top of the marshmallows. They can be used for extra richness or texture if desired.
Directions & Preparation
Step 1: Preheat oven to 350°F (175°C).
Preheating the oven ensures that your bars cook evenly and are well-baked. This step is crucial for achieving the ideal texture for both the crust and the melted chocolate.
Step 2: Grease a 9×13 inch baking pan with non-stick spray or butter.
Greasing the pan prevents the bars from sticking, allowing easy removal once they’re set. This ensures that you can enjoy perfect slices without leaving half behind in the pan.
Step 3: In a large bowl, mix graham cracker crumbs, powdered sugar, and melted butter until combined.
Mixing these ingredients together until fully incorporated is vital to create a cohesive crust that holds together. The mixture should feel moist but not wet, forming a sandy texture that sticks when pressed.
Step 4: Press the mixture into the bottom of the prepared pan.
Pressing firmly helps the crust to hold its shape during baking and provides a solid base for the layers above. Ensure it’s evenly distributed for consistent texture and flavor across the bars.
Step 5: Bake the crust for 8-10 minutes or until it's lightly golden brown.
Baking the crust a bit before adding the fillings firm it up and adds a nice golden color. It creates a slight crispiness that contrasts beautifully with the soft chocolate and marshmallows.
Step 6: Remove the pan from the oven and layer the broken chocolate bars evenly over the crust.
Adding the chocolate now allows it to melt slightly into the warm crust, creating a cohesive base layer. Ensure even coverage to avoid any spots without chocolate!
Step 7: Place the pan back in the oven for 3-5 minutes until chocolate melts.
This brief touch in the oven softens the chocolate, making it easy to spread. It’s important to keep an eye on it to avoid burning, as chocolate can go from melted to scorched quickly.
Step 8: Remove from oven and sprinkle marshmallows on top of the melted chocolate.
Spreading the marshmallows while the chocolate is still warm lets them adhere better and ensures a gooey top layer. Pack them closely for that ideal toasted marshmallow experience.
Step 9: Turn the oven to broil and carefully put the pan back in for 1-2 minutes.
Broiling allows for a quick browning of the marshmallows, achieving that toasty top without overcooking. Watch closely, as they can go from perfectly toasted to burnt in a matter of seconds!
Step 10: Once browned, remove the pan from oven and let cool completely.
Allowing the bars to cool sets the layers properly and makes them easier to cut. You can speed up this process by placing them in the fridge for a bit.
Step 11: Cut into bars and serve.
Slicing into bars can be tricky due to the stickiness of marshmallows. Warming a knife under hot water helps make clean cuts, reducing the mess while serving.

The Art of Layering Flavors
Each component in s'mores bars serves a distinct purpose, from the crunchy base of graham crackers to the creamy chocolate and sticky marshmallows. Layering these flavors not only enhances the overall experience but also creates a satisfying contrast in textures. The key to a perfect s'mores bar is ensuring that each layer is well-balanced, allowing the sweetness of the marshmallow to complement the rich chocolate and sturdy crust.
Tips for a Perfect Consistency
Achieving the right consistency for the s'mores bars is crucial to their overall success. The crust should be thick enough to withstand the layers above without crumbling while remaining soft enough to cut through easily. If the crust feels too dry, adding a touch more melted butter can help; conversely, if it’s too wet, additional graham cracker crumbs can absorb excess moisture, ensuring a cohesive mixture.
Variations to Try
Once you've mastered the classic s'mores bar, consider experimenting with variations! Try adding peanut butter chips for an extra layer of flavor, or incorporate crushed nuts for a delightful crunch. You could even swap out the chocolate for white chocolate or dark chocolate, allowing for a new twist on the beloved s’mores experience. Each variation adds its unique flair, making every batch a new culinary adventure.
FAQs
What should I do if my crust is too crumbly?
If your crust is crumbly, it likely needs more moisture. Gradually add melted butter, mixing until the crumbs hold together when pressed. Ensure it’s evenly combined for a solid structure.
Can I use different chocolate varieties for this recipe?
Absolutely! Feel free to use dark chocolate, white chocolate, or even flavored chocolates like caramel or mint. Just ensure that the chocolate you choose melts well.
What can I do if the marshmallows don't brown evenly?
If your marshmallows are browning unevenly, it may require rearranging them before broiling. Alternatively, a kitchen torch can be used after baking to achieve even browning without affecting the rest of the bars.
Why did my marshmallows turn into a hard crust on top?
If marshmallows harden, it could be due to overcooking during broiling. Always keep a close watch during this step and remove them as soon as they reach desired browning.
Is there a way to make these bars less sweet?
To reduce sweetness, consider using bittersweet chocolate instead of milk chocolate, or reduce the amount of powdered sugar in the crust. Adding a pinch of salt can also balance the sweetness.
What adjustments do I need to make if I want to double this recipe?
To double the recipe, simply multiply each ingredient by two and use a larger baking pan to give them enough room to cook evenly. Adjust baking time as necessary, checking for doneness.
Conclusion
S'mores bars capture the essence of a timeless treat with their perfect harmony of flavor and texture. Preparing them at home allows for creativity and personal touches, making each batch uniquely your own.
Whether shared with friends or enjoyed quietly at home, these bars provide a comforting taste of nostalgia. Enjoy every bite, and embrace the joy of this simple yet delightful dessert.
Recipe Card
Indulgent S’mores Bars for Delightful Evenings
Ingredients
Method
- Preheat oven to 350°F (175°C).
- Grease a 9x13 inch baking pan with non-stick spray or butter.
- In a large bowl, mix graham cracker crumbs, powdered sugar, and melted butter until combined.
- Press the mixture into the bottom of the prepared pan.
- Bake the crust for 8-10 minutes or until it's lightly golden brown.
- Remove the pan from the oven and layer the broken chocolate bars evenly over the crust.
- Place the pan back in the oven for 3-5 minutes until chocolate melts.
- Remove from oven and sprinkle marshmallows on top of the melted chocolate.
- Turn the oven to broil and carefully put the pan back in for 1-2 minutes.
- Once browned, remove the pan from oven and let cool completely.
- Cut into bars and serve.
Tried this recipe?
Let us know how it was!Notes
Additional serving suggestions: pair with a crisp salad, garlic bread, or roasted seasonal vegetables for balance.
For make-ahead, prep components separately and assemble just before heating to preserve texture.
Taste and adjust with acid (lemon/vinegar) and salt right at the end to wake up flavors.