Introduction
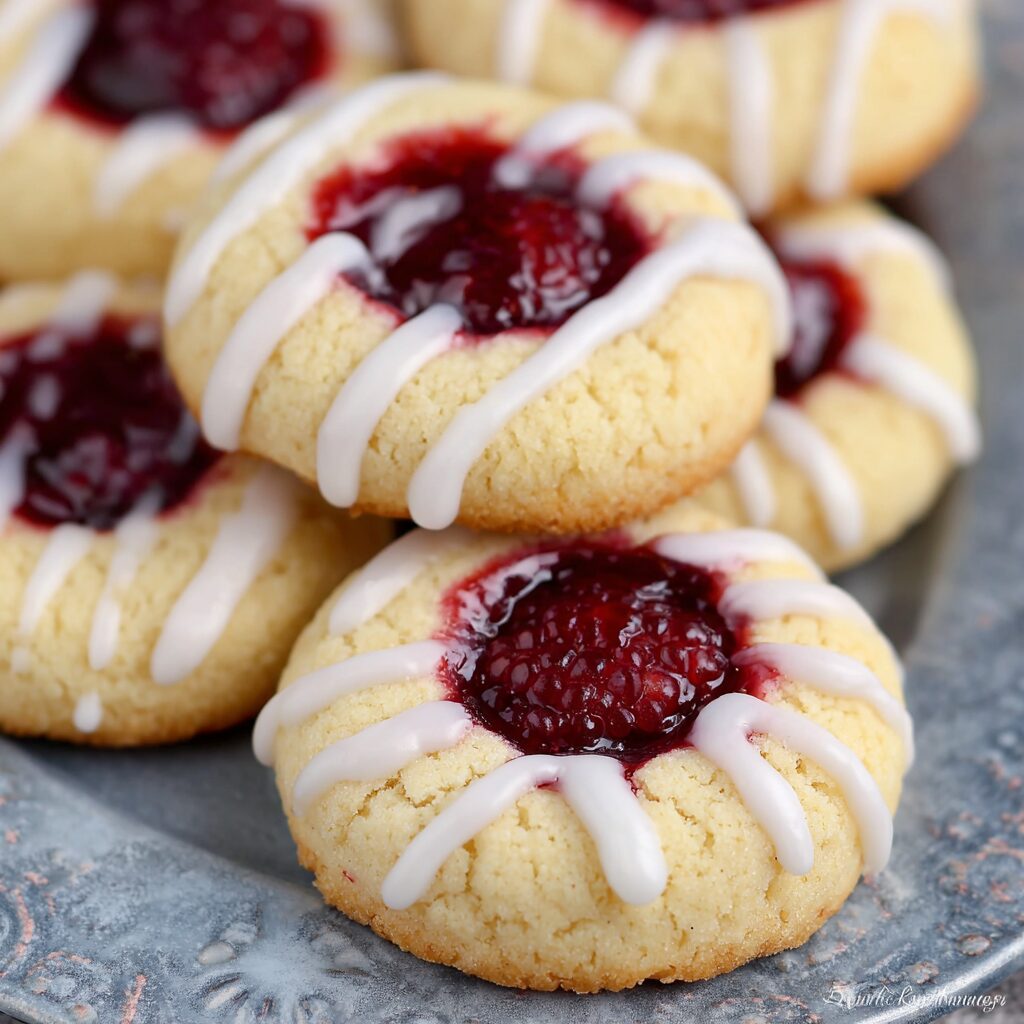
Raspberry thumbprint cookies are a delightful treat that combines a buttery cookie base with a sweet and tangy filling. The vibrant raspberry jam creates a beautiful contrast, both in flavor and appearance, making these cookies perfect for any occasion.
These cookies are not just visually appealing; they also offer a harmonious balance of textures. The crisp edges and soft centers complement the rich icing, ensuring every bite is a delightful experience.
Enjoy making these cookies for a family gathering or a cozy afternoon snack, and relish the compliments that will come your way once you serve them.
Ingredients
- 1 cup unsalted butter, softened
Butter serves as the primary fat, providing moisture and a rich flavor to the cookies. Softening the butter ensures it blends smoothly with the sugar, creating a fluffy texture during the creaming process. - 3/4 cup granulated sugar, divided
Sugar not only sweetens the cookies but also contributes to their structure and texture. Dividing the sugar allows for better incorporation with the butter and enhances the cookie's final sweetness. - 1 teaspoon vanilla extract
Vanilla extract enhances the overall flavor profile, adding warmth and depth. It balances the sweetness and complements the tartness of the raspberry jam. - 2 cups all-purpose flour
Flour provides the necessary structure for the cookies. All-purpose flour is perfect for this recipe as it allows the cookies to maintain a delicate balance between crispness and chewiness. - 1 teaspoon baking powder
Baking powder acts as a leavening agent, helping the cookies rise and achieve a light texture. It’s essential to ensure even mixing for a uniform rise. - 1/4 teaspoon salt
Salt enhances the flavors of the other ingredients, making the cookies taste more balanced. It is crucial for elevating the sweetness and richness of the cookies. - 2/3 cup seedless raspberry jam
Raspberry jam is the star of this recipe, providing a burst of fruity flavor and color. Using seedless jam ensures a smooth filling that creates a pleasing appearance in the cookies. - 1/2 cup confectioners' sugar
Confectioners' sugar is used for the icing, giving it a smooth, sweet finish. It dissolves easily in liquid, resulting in a glossy glaze that complements the cookies beautifully. - 1/2 teaspoon vanilla extract (for icing)
Adding vanilla extract to the icing not only deepens the flavor but also ties the icing back to the flavors of the cookie, creating a cohesive taste experience. - 2-3 tablespoons water (for icing)
Water helps achieve the desired consistency for the icing, ensuring it can be drizzled over the cookies. Adjusting the amount of water allows you to control the thickness.
Directions & Preparation
Step 1: Cream the softened butter with 1/2 cup of granulated sugar until light and fluffy.
This initial step is vital as creaming the butter with sugar incorporates air, leading to light and tender cookies. Aim for a pale yellow color and a texture that resembles whipped cream, which usually takes about 2-3 minutes at medium speed.
Step 2: Add the vanilla extract and mix in, then beat in the egg until well combined.
Integrating the vanilla and egg at this stage adds moisture and depth of flavor. Ensure the egg is fully incorporated, allowing for the perfect binding of the ingredients which contributes to the cookies' structure.
Step 3: In a separate bowl, whisk together the flour, baking powder, and salt.
Whisking the dry ingredients together ensures even distribution of the leavening agent and salt. This prevents any pockets of baking powder in the dough, leading to more uniform cookies.
Step 4: Gradually add the flour mixture to the wet ingredients and mix until just combined.
Over-mixing the dough can lead to tough cookies, so it's important to mix just until combined. This step is critical for achieving the right tenderness in the final product.
Step 5: Chill the dough for one hour to firm it up.
Chilling the dough helps the cookies maintain their shape during baking, preventing excessive spreading. It also allows the flavors to meld, resulting in a more flavorful cookie.
Step 6: Preheat your oven to 350°F (180°C) and line baking sheets with parchment paper.
Preheating your oven ensures that the cookies bake evenly. Lining the baking sheets prevents sticking and makes cleanup easier, allowing you to focus on enjoying your cookies.
Step 7: Shape the dough into 1-inch balls and roll them into the remaining granulated sugar.
Rolling the dough in sugar adds an appealing crunch and a hint of sweetness to the cookie’s surface. Make sure to space the balls at least 2 inches apart on the baking sheets to allow for spreading during baking.
Step 8: Using your thumb or the back of a spoon, make an indentation in the center of each ball.
Creating a well allows for the raspberry jam to nestle in perfectly. This step is essential to ensure the jam does not overflow while baking, maintaining the visual appeal of each cookie.
Step 9: Bake in the preheated oven for 13–16 minutes or until the edges are lightly browned.
Keeping an eye on the cookies as they bake is crucial. The edges should be just beginning to set while the centers remain soft, ensuring the cookies will have a pleasant texture once cooled.
Step 10: Remove from the oven and let them cool on the baking sheet for 5 minutes before transferring to a wire rack.
Allowing cookies to rest on the baking sheet helps them firm up, making it easier to transfer without breaking. The cooling process on the wire rack allows airflow, preventing sogginess.
Step 11: Spoon raspberry jam into the centers of the cooled cookies.
This step showcases the jam as the focal point of the cookie. The jam can be slightly warmed for better flow, ensuring it fills the indentation beautifully and makes for an attractive presentation.
Step 12: Prepare the icing by mixing confectioners' sugar, vanilla extract, and water until smooth.
Achieving the right consistency for the icing is essential for drizzling. A smoother mixture allows for a beautiful drizzle effect over the cookies, enhancing their look and flavor.
Step 13: Drizzle the icing over the filled cookies and let it set.
This final touch adds an extra layer of sweetness and a decorative finish. Letting the icing set ensures it maintains its shape on the cookies, adding to the visual appeal when served.

Elevating the Raspberry Flavor
To enhance the raspberry essence, consider using fresh raspberries as a topping after the icing sets. This not only adds a fresh burst of flavor but also creates an eye-catching presentation. Another approach is to incorporate a hint of lemon zest into the cookie dough or jam, amplifying the tangy notes in the overall flavor profile.
Creative Variations on a Classic
Experimenting with different jams can lend a unique twist to these cookies. Consider flavors like apricot or blackberry for an unexpected but delightful variation. Additionally, you can introduce finely chopped nuts, such as pistachios or almonds, into the dough for added texture and a nutty flavor that pairs well with the sweet jam filling.
Serving Suggestions for Every Occasion
These raspberry thumbprint cookies can be ideal for various occasions. For a casual afternoon tea, pair them with a light herbal tea or an iced coffee. They also make splendid gifts when packaged in a decorative cookie box. For festive gatherings, a plate of these cookies can become the centerpiece of your dessert table, captivating guests with their vibrant colors and delightful taste.
FAQs
What can I do if my jam runs out of the cookie after baking?
To prevent the jam from overflowing, ensure that your thumbprint is deep enough before baking, but not excessively so. If this happens, you can spoon extra jam into the cookies after they are baked.
What should I do if my cookie dough is too sticky?
If the dough feels sticky, try chilling it for an additional 15-30 minutes. This should help firm it up, making it easier to shape into balls without sticking to your hands.
Can I adjust the sweetness of the icing?
Yes, you can alter the sweetness by adjusting the amount of confectioners' sugar for the icing. Start with less sugar, then gradually add until you reach your desired level of sweetness.
Is it possible to scale this recipe for a larger batch?
Absolutely! Simply multiply the ingredients by the number of desired servings, while keeping the proportions the same to maintain the excellent flavor and texture.
What if my cookies are baked too long and are hard?
If cookies become too hard, it's crucial to monitor baking time closely. For future batches, consider reducing the baking time by 1-2 minutes to achieve a softer, chewier texture.
Can I use a different filling besides raspberry jam?
Certainly! You can experiment with various fruit jams or even chocolate ganache to give a new flavor twist to your thumbprint cookies.
Conclusion
Creating raspberry thumbprint cookies is a rewarding baking experience that results in a treat that’s not only delicious but also visually captivating. With a delicate balance of flavors and textures, these cookies are sure to impress family and friends.
Whether enjoyed fresh out of the oven or as a sweet addition to a dessert platter, these cookies will leave everyone wanting more. Their versatility and stunning presentation make them a fantastic choice for any occasion.
Recipe Card

Delightful Raspberry Thumbprint Cookies with Icing
Ingredients
Method
- Cream the softened butter with 1/2 cup of granulated sugar until light and fluffy.
- Add the vanilla extract and mix in, then beat in the egg until well combined.
- In a separate bowl, whisk together the flour, baking powder, and salt.
- Gradually add the flour mixture to the wet ingredients and mix until just combined.
- Chill the dough for one hour to firm it up.
- Preheat your oven to 350°F (180°C) and line baking sheets with parchment paper.
- Shape the dough into 1-inch balls and roll them into the remaining granulated sugar.
- Using your thumb or the back of a spoon, make an indentation in the center of each ball.
- Bake in the preheated oven for 13–16 minutes or until the edges are lightly browned.
- Remove from the oven and let them cool on the baking sheet for 5 minutes before transferring to a wire rack.
- Spoon raspberry jam into the centers of the cooled cookies.
- Prepare the icing by mixing confectioners' sugar, vanilla extract, and water until smooth.
- Drizzle the icing over the filled cookies and let it set.
Tried this recipe?
Let us know how it was!Notes
Additional serving suggestions: pair with a crisp salad, garlic bread, or roasted seasonal vegetables for balance.
For make-ahead, prep components separately and assemble just before heating to preserve texture.
Taste and adjust with acid (lemon/vinegar) and salt right at the end to wake up flavors.